View data in UI
In the previous lab, the entire lab was validated which resulted in asset data being stored in MongoDB. While we have seen the raw data within the database, to express the data visually, a user interface will be deployed to highlight several of the concepts emphasized in this lab.
UI Application
To visualize the data that has been sent by the software simulator and processed through the set of OpenWhisk functions, a Patternfly based UI app will be deployed that will show the results on a geographical map. The app will show the geofence of each asset and description of the selected asset. If an asset crosses its geofence, then an alert will be shown on the map. The google map API is being used to display the location of assets and geofence on the map. The source for the frontend application is located in the iot-serverless-ui/src/main/resources/static folder.
Deploy the UI Application
Templates have been created to support the building of a custom image containing the application along with the deployment to OpenShift.
First, navigate to the root of the project folder and instantiate the template to build the image:
$ cd /home/lab-user/iot-serverless/
$ oc process -f applier/templates/ui-build.yml | oc apply -f-

imagestream "ui" created
buildconfig "ui" created
A new BuildConfig and ImageStream will be created along with the triggering of the Source-to-Image based build in OpenShift.
A new build should be automatically triggered. Verify the build has started by running the following command:
 $  oc get builds -l application=ui

 NAME                TYPE      FROM          STATUS    STARTED              DURATION
ui-1      Source    Git@bf8b87e   Running   About a minute ago
When a build is present and running, the logs from the build execution can be seen using the following command:
$ oc logs -f builds/<build_name>When the image has been built successfully, another template can be instantiated to create the associated DeploymentConfig, Service and the Route exposing the application outside the cluster. A single parameter must be provided with the name of the MongoDB service which is used to connect to the backend persistent store within the iot-serverless project.
Execute the following command to instantiate the UI deployment template.
$ oc -p MONGODB_SERVICE=mongodb process -f applier/templates/ui-deployment.yml | oc apply -f-

service "ui" created
route "ui" created
deploymentconfig "ui" created
Verify the ui is active by verifying the status using the following command:
$ oc get pods -l application=ui

NAME                    READY     STATUS    RESTARTS   AGE
ui-1-v76rm   1/1       Running   0          1m
A READY column indicating 1/1 denotes the service is ready and available
To access the newly deployed application in a web browser, execute the following command to get the url of the from the route:
$ oc get routes

NAME      HOST/PORT                                         PATH      SERVICES   PORT       TERMINATION   WILDCARD
ui        ui-iot-serverless.apps-<GUID>.generic.opentlc.com             ui         8080-tcp                 None
In the browser, navigate to the url listed in the HOST column.
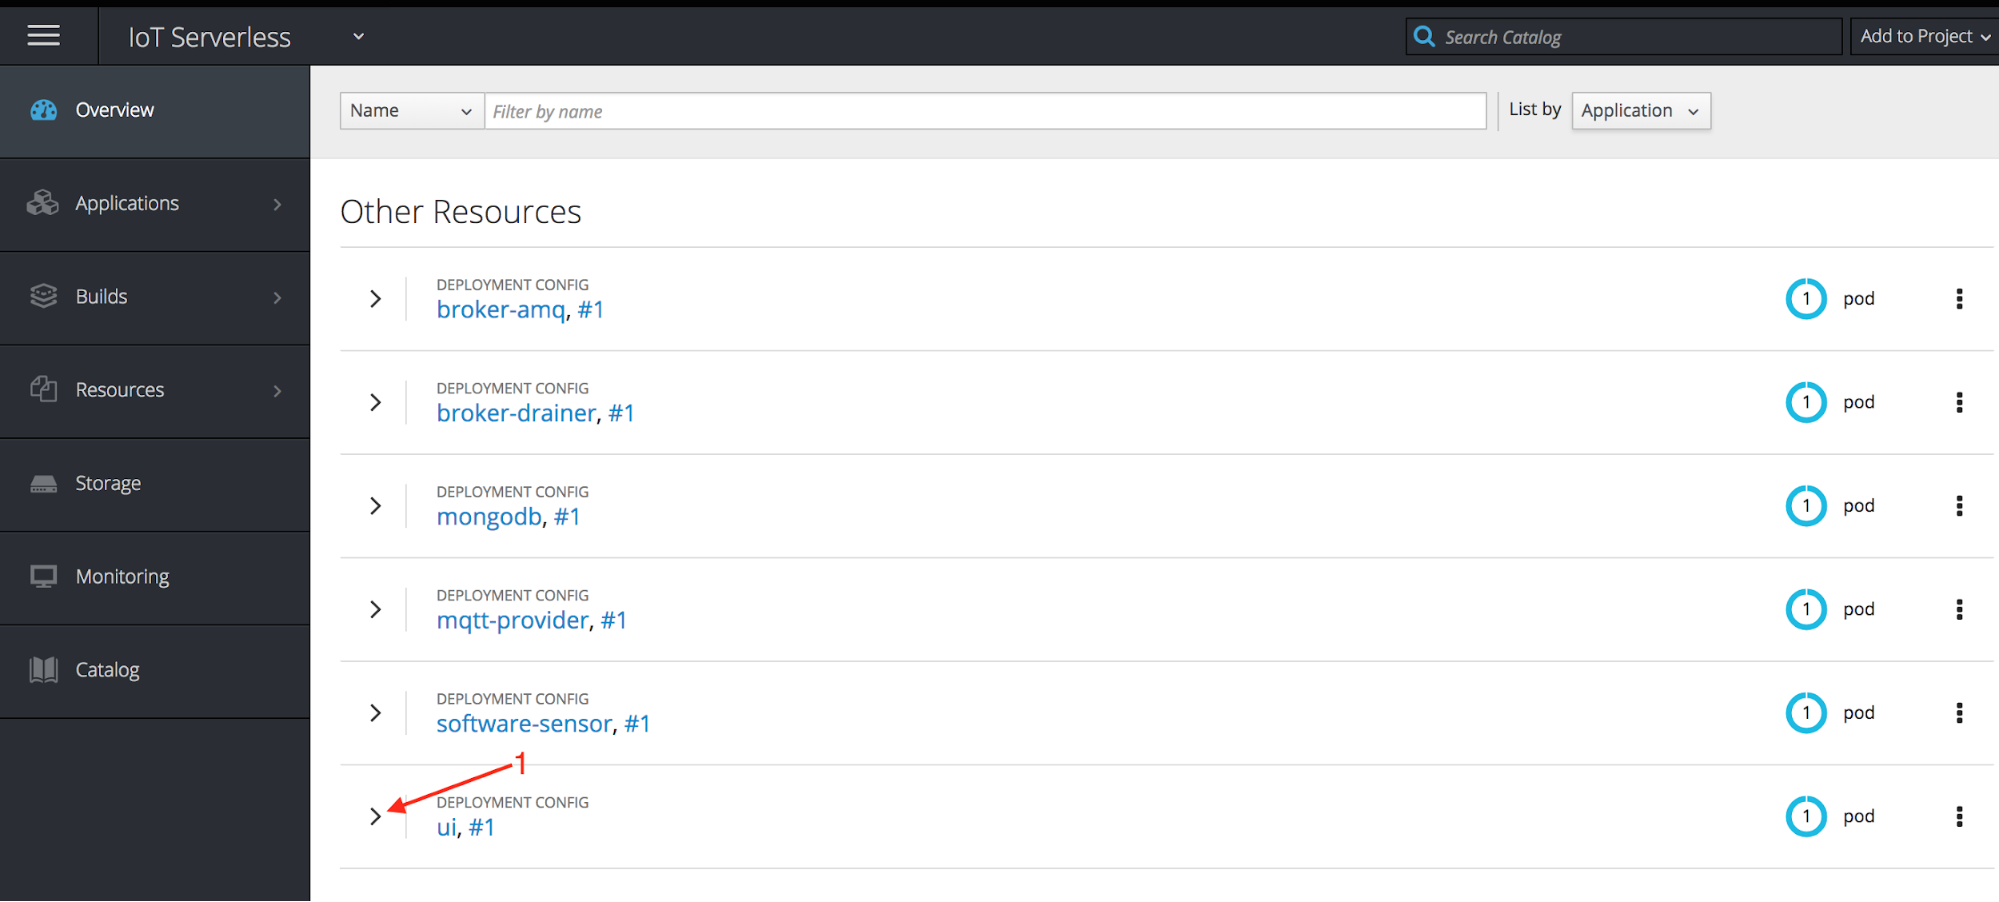
Alternatively, the OpenShift web console can be used to access the UI application.
Navigate to https://infranode-<GUID>.generic.opentlc.com:8443, select the iot-serverless project and then click on the UI pod to view the expanded view:
Click on the URL provided
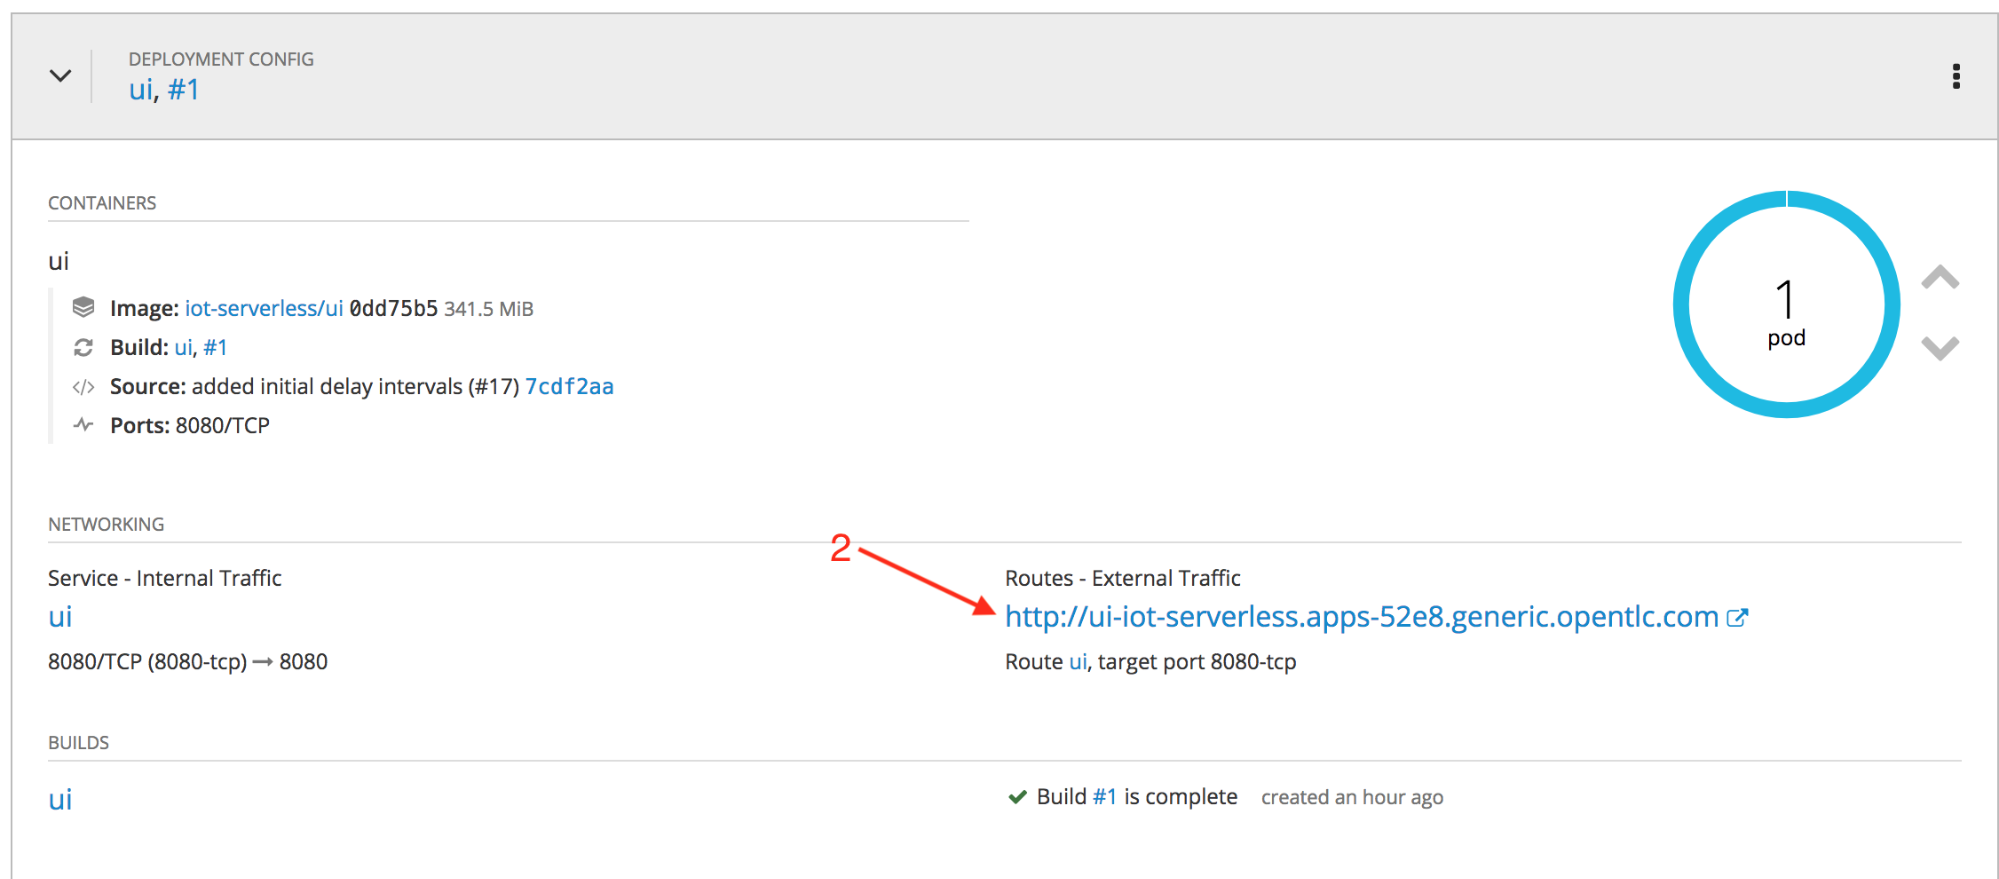
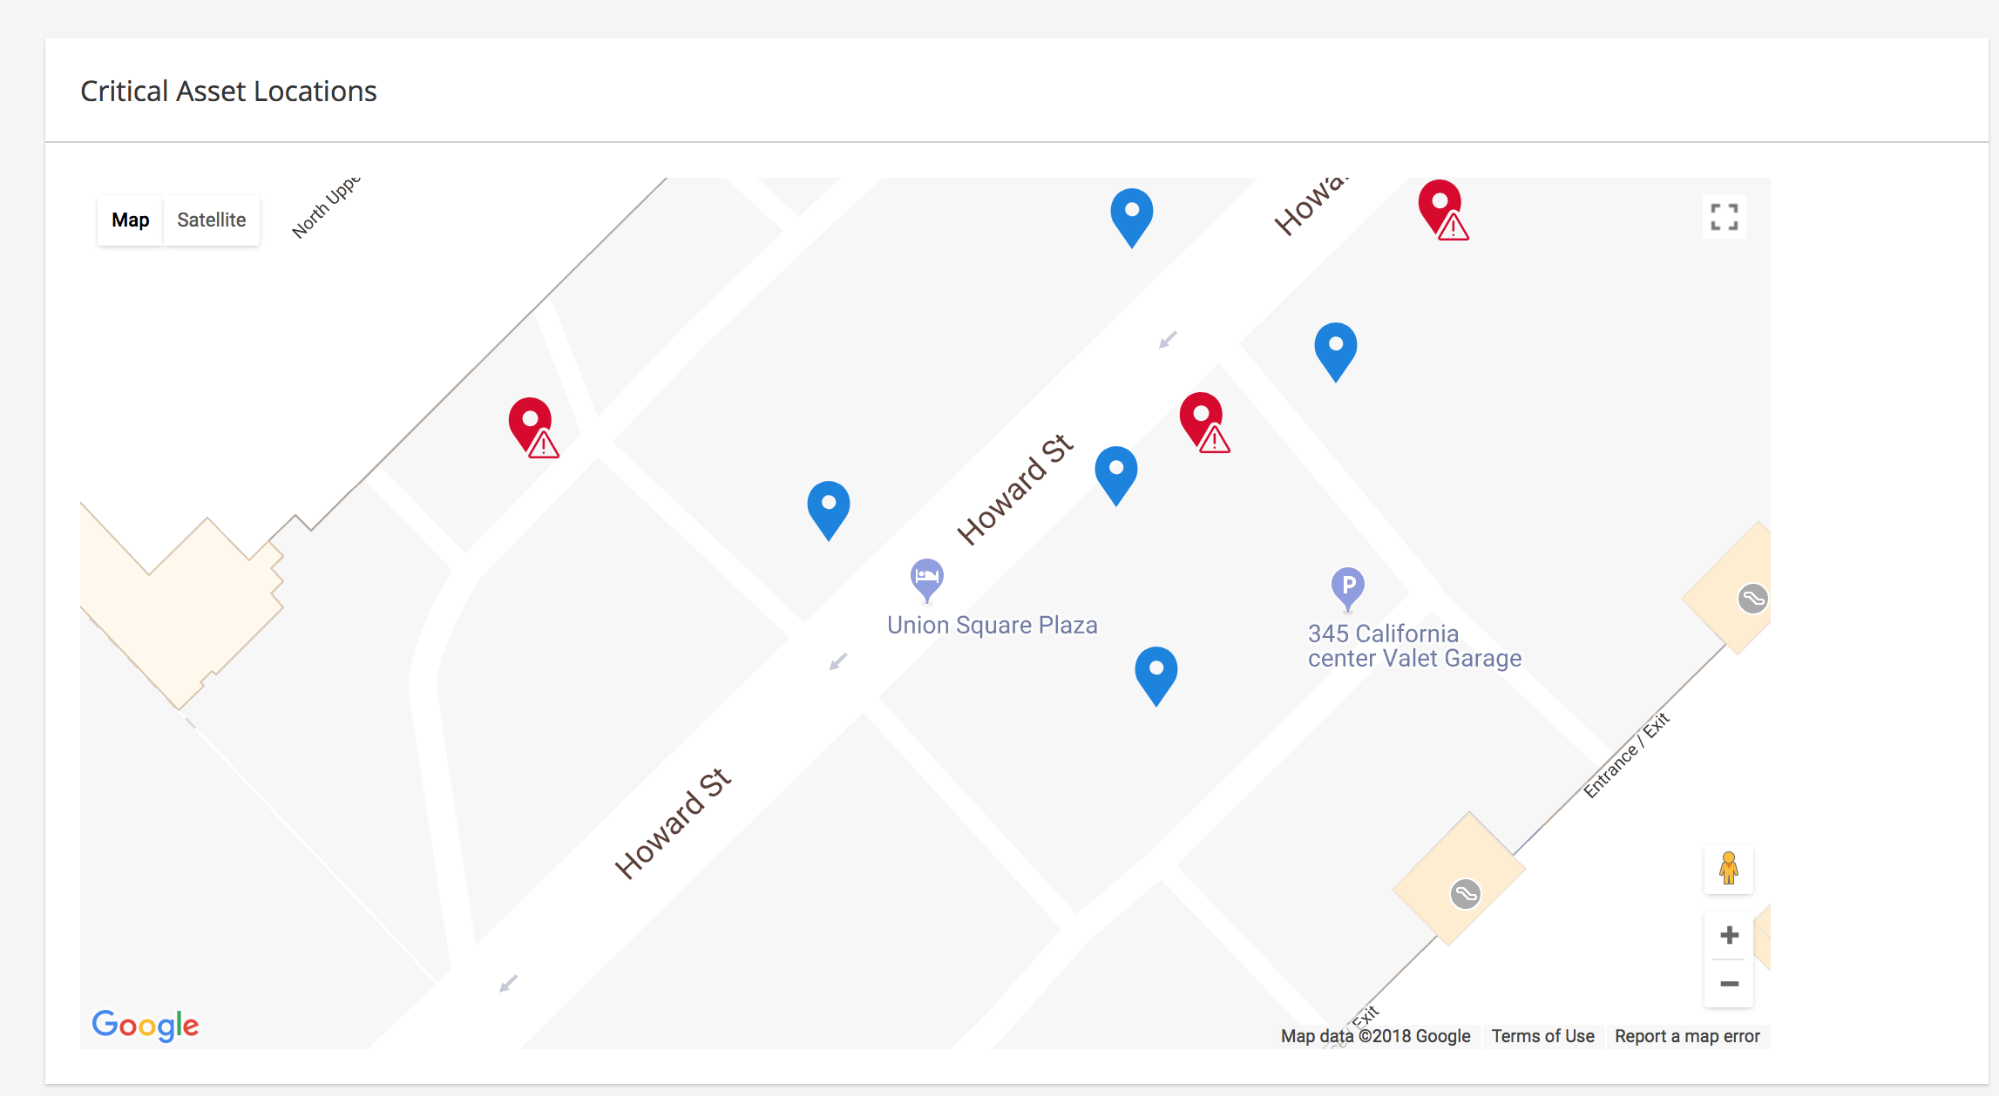
The UI application will load and display the real time location of assets on the map:
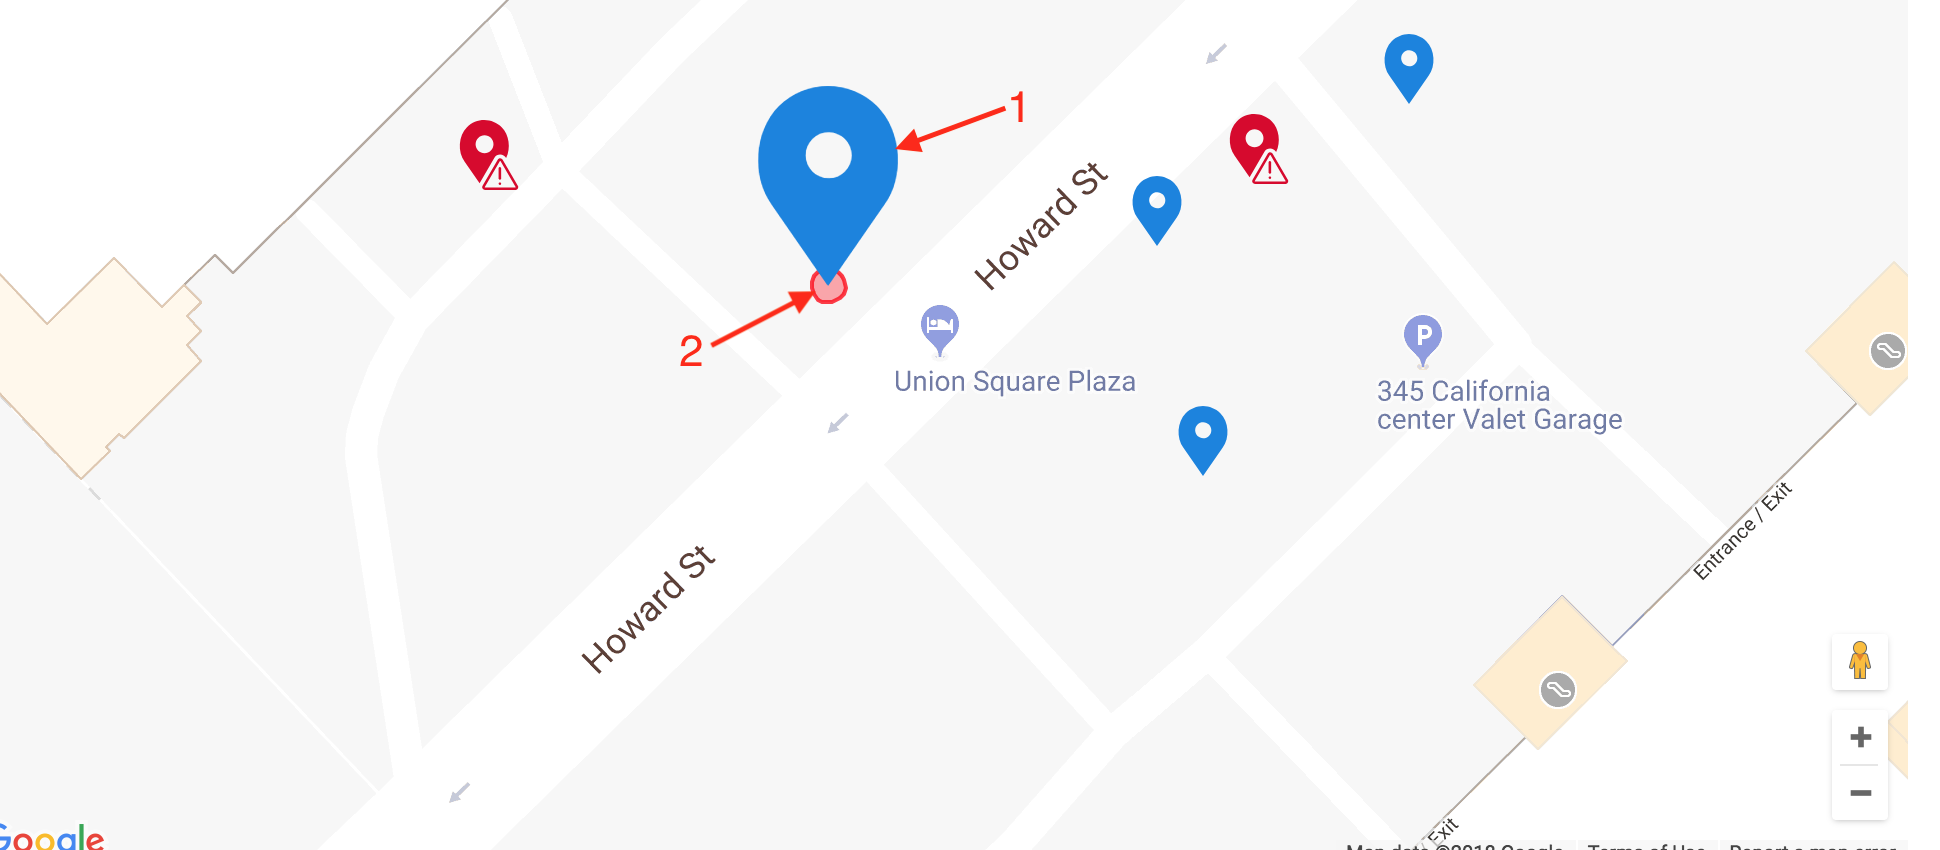
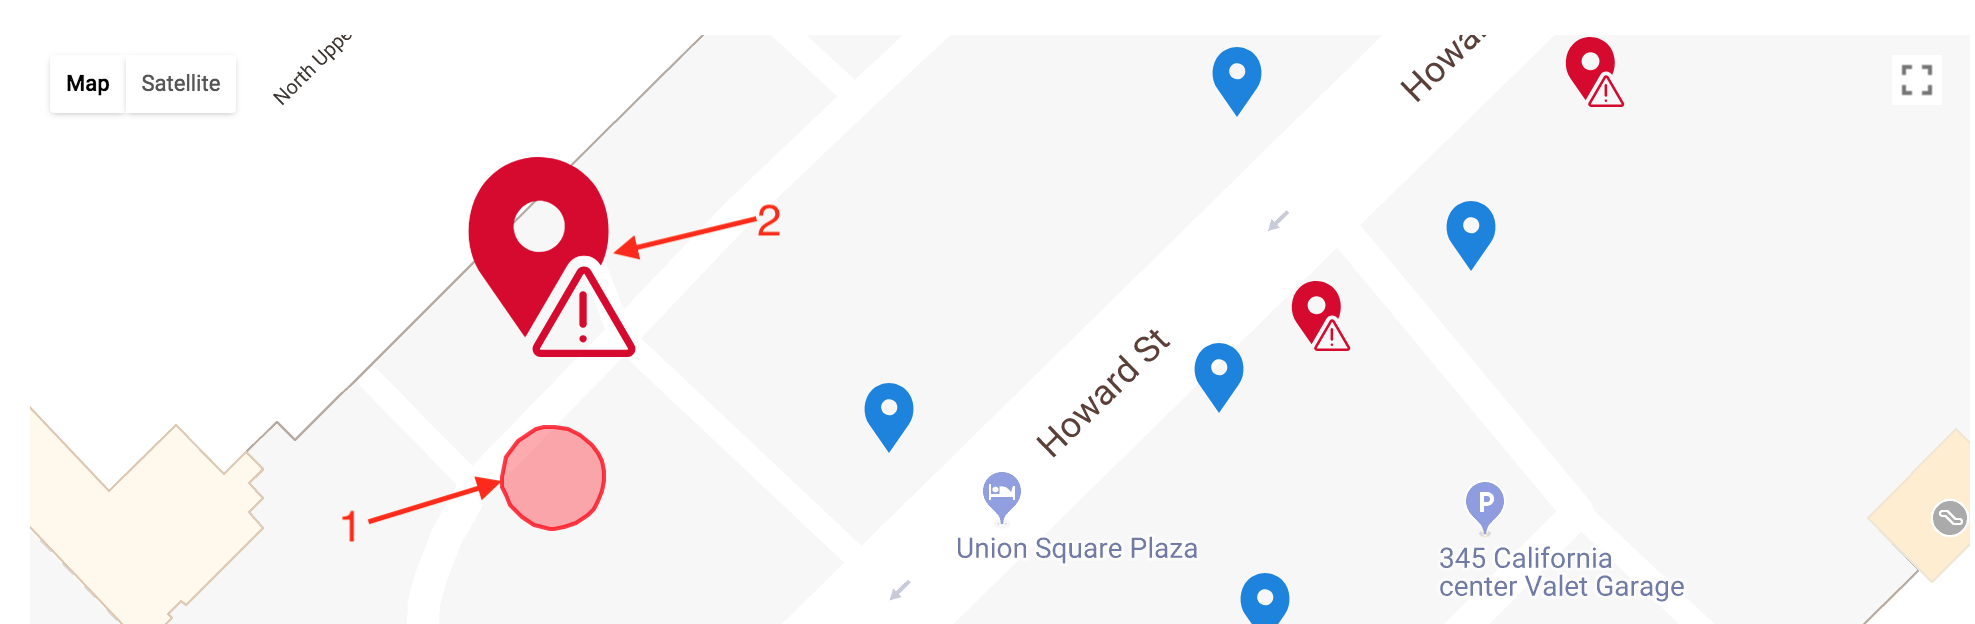
Select an asset by clicking on its marker. The selected asset will display a larger marker (1) and its geofence (2):
If an asset has crossed it geofence (1), a warning marker (2) will be displayed:
More information about the selected asset is also displayed at the bottom of the page:
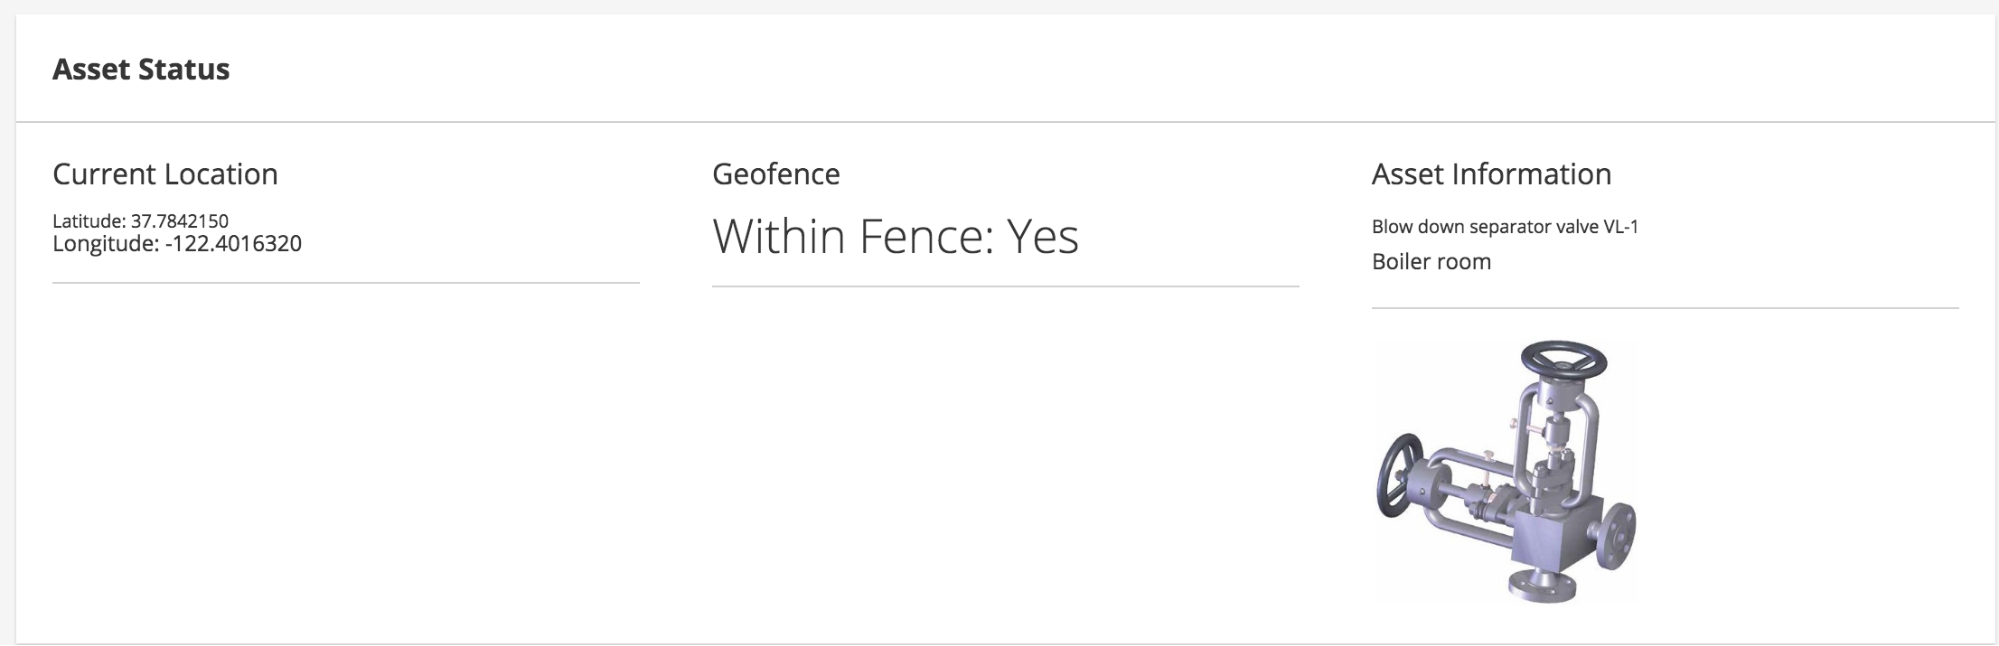
Feel free to select each of the assets to learn more about the IoT devices that are being utilized in this lab.
![]()
![]()
![]()